Tuesday, June 5, 2012

Strawberry & Watermelon Slushies

With the weather becoming warmer and warmer I've been feeling more and more summery. One of my favourite summer treats? Watermelon!

This week, I decided to try something a little different with some watermelon.

I found this link on Pinterest that talks about how to pick and cut-up the perfect watermelon ::link:: The method demonstrated for cutting up the watermelon was so easy and made less of a mess than I usually make.

But, back to the slushies! This idea was a delicious alternative to ice cream and was very refreshing.

I should mention that these measurements are approximate because I was eyeballing it. Also, I washed, cut, and froze my fruit two days before.
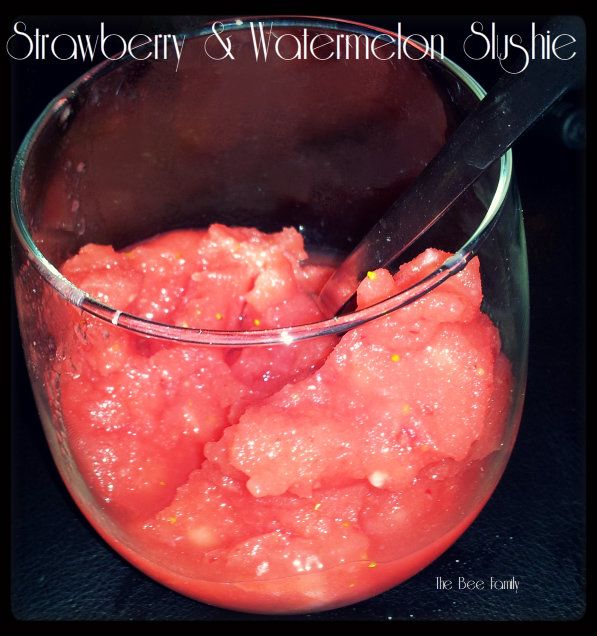


What You Need:

2 cups cut up and frozen watermelon
1 cup cut up and frozen strawberries
1/2 cup ice
2 tbsp liquid strawberry daiquiri mix
Squirt of lemon juice

How To Make It:

Throw everything in a blender and let it whirl! You may need to take the lid off and mix it around every so often. I found that the slushie part kept getting stuck on the bottom, while the uncrushed bits rested on the top.

You can add less or more of any of the ingredients to make it better fit your tastes.

Blend until it is mixed together. Simple!

Things I will change for next time? Using smaller ice cubes! I have somehow lost all my ice cube trays, so I only had large starfish shaped silicone baking molds. It may have been easier to crush the ice separately and add it to the mix.


I would also freeze my fruit in a single layer on a cookie sheet and then add it to a freezer bag (this is what I do when blanching/freezing veggies). I placed my cut fruit in bowls in the freezer and they froze into big lumps. Doh!

The flavour combinations are endless, too! I think banana would go well with this combo. You could add blueberries, pineapple, kiwis....Delicious!

Tuesday, May 15, 2012

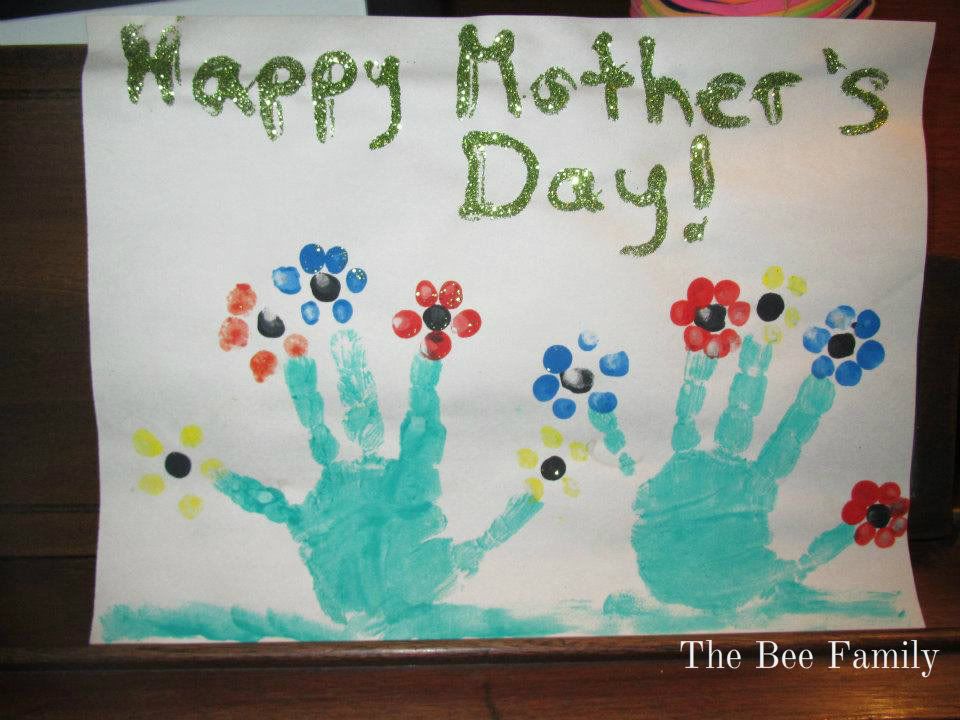
Mother's Day Craft

Mother's Day is over but this craft can be used at any time of year!

All you need are:

Paper
Green paint
Black paint
Paints in whatever colours you like
Glue
glitter

To make it you just:

Paint your child's hand green and press it onto your paper twice. These are your flower stems.

Next, make a black dot above each stem. This is the flower centre.

Then, let your child dip their finger in your coloured paints and dap it around the black circle to make flowers.

Write a message in glue and sprinkle on some glitter and TA-DA!

Tuesday, April 10, 2012

Trees and Butterflies

Today was a gloomy, cold, and rainy day so we've been inside crafting.

Today, we made spring trees and butterflies to bring some brightness to our otherwise yuck day.

As with most other crafts I do, these are easy and ones that involve your kiddo(s)!

So, let's start with our Spring Tree!

What You Need:

Pencil
White paper
Brown paint
Pink tissue paper
White glue

How to make it:

Trace your child's hand and forearm onto a piece of paper and fill it in with brown paint.


When it's dry, let your toddler squeeze the glue onto the hand part of the tree.


Then, have them rip up small pieces of tissue paper, which you then roll into little balls.


Give your toddler your tissue paper balls and have them press them onto the glue.


Ta-da! You have a tree sprouting some lovely pink spring blossoms!


Our second craft are Footprint Butterflies!

What You Need:

Paints, in as many colours as you'd like
Paper plate
Blank paper
Black marker

How to:

Squeeze your paints onto the paper plate in which even design you'd like your butterfly wings to appear.


Then, press your child's foot into the paint and press that onto your blank paper.


Make another print beside the first and when they have dried paint on your butterfly body. When that has dried draw on eyes and a smile using your marker.

Ta-da!


Another easy and cute craft!

Monday, April 9, 2012

White Bean and Sausage Cassoulet

The above-average warm weather we enjoyed for a few weeks has given way to cooler temperatures more common for Spring in these parts. There was a crisp breeze floating through the windows and the day was more overcast than sunny. So, I pulled out my Dutch oven and decided to make my own rendition of this sausage and white bean cassoulet.

This meal was incredibly filling, even without the sausages (I didn't eat any). It was packed with flavour and was a hit with the entire family. It was fairly easy to make, too! Here's the how-to:

White Bean and Sausage Cassoulet
Serves 4

What You Need:

2tbsp butter/margarine
3-4 cloves garlic
1/3 cup Worcester sauce
Sausages (we used 6 pork sausages)
2 large red bell peppers, chopped (large pieces)
1 large onion (cut in half and then those halves cut into quarters)
2 portobello mushrooms, cut into large chunks
3 tomatoes, quartered 
2 sweet potatoes, cubed (mine were about an inch wide)
1-19oz. can white kidney beans, washed
Salt and pepper

Preheat your oven to 400F and in a Dutch oven (or other lidded oven-safe dish) add your margarine, peppers, sweet potatoes, tomatoes, onion, garlic, and Worcester sauce. Mix it together, add salt and pepper and place your sausages on top.

Cook in the oven for 20-30 minutes, until sausages start to become golden and vegetables become soft.


Add in your mushrooms and beans and place back in oven for 20-25 minutes, until mushrooms are soft.

My sausages didn't get as golden/brown in the oven as I liked, so I took them out of the dish and fried them quickly to get more colour. 

Then, simply serve (crispy French bread optional).


So delicious!

Spring into Spring!

Easter is officially over, which means today I will be packing away those decorations and readying our house for spring.

That means out with the old Easter art and in with the Spring!

Friday, April 6, 2012

Happy Easter Weekend!

We're busy all this weekend with family events. Today kicked off our first family visit and was full of laughs, egg hunts, a bonfire, and sooooooo many yummy treats.

My son and I made bunny cakes:


And we enjoyed the amazing deliciousness that was s'mores made with marshmallow peeps! SO GOOD!


Now, we're all happy with bellies full of yummy treats and many more adventures to come.

Happy Easter!

Tuesday, April 3, 2012

Cheery Cherry Trees

Today, we made this cherry blossom tree:

It's super simple! I used a foam board, but you can use paper, bristol board...anything!

Then, you just paint on your tree and dip a pop (soda) bottle end in pink paint and use that to make your blossoms! We used a small bottle instead of the larger 2L bottles.


Then, I dry brushed on some green for our grass and TA-DA! Lovely.