Monday, February 27, 2012

St Patrick's Day Craft - Leprechaun and Shamrock Tree

I've been googling and looking on Pinterest for some St. Patrick's Day crafts and there is surprisingly little out there for kids in the 2-3 age bracket. So, I've had to improvise and create some ideas of my own!

Today, we decided to make two St. Patrick's Day crafts. Neither are labour intensive because I have a sicky little boy on my hands and he's not wanting to do much of anything today.

But, this craft uses some of his favourite things...paints and glitter glue!

Let's start with our Handprint Leprechaun!

What You Need:

White paper
Brown and red paints
Pink & red construction paper
Green and yellow paper (I used cardstock)
Blue paint or paper
Black marker
A hand (hopefully you have at least one of these...)

How to Make it:

Mix some brown and red paint together to get a ruddy colour. Then, paint your child's hand with this and press the hand onto a piece of paper. Make sure the fingers are spread out a little! Note: It is incredibly hard to get a 3 month old to let you paint her hand and press it onto paper.


While this is drying, cut out a green hat. I added a small strip of yellow and a buckle. Glue this to the paper above your handprint (the fingers of the print should be pointing down), leaving some white space between the hat and the handprint.


I cut out a red smile and glued it onto the handprint near the top. Then, I had my toddler dip his finger in blue paint and dab on some eyes, once that dried I added a black dot in the middle.

Add a black dot for a nose and then cut out two little pink circles for rosy cheeks.


And there you have a bearded Leprechaun!


I asked my son if he wanted to add hair and he said "NO!"...so, we have some bald leprechauns. If you wanted, you could paint on some hair or even use yarn!

Our next craft is a Handprint Shamrock Tree


What You Need:

White paper
A pencil
Brown paint
Green paint
Green construction paper or cardstock
Green and gold glitter glue
White glue

How to Make it:

Trace your child's hand and forearm onto a piece of white paper and paint it in with brown (my toddler helped with this part).

Give your toddler some green paint and let them dab and smear on some green leaves. While they're doing that, cut some shamrocks out of your green paper.


Add glue to the back and let your toddler stick them onto the paper.


Squeeze some glitter glue onto a scrap piece of paper and let your toddler finger paint it onto the tree.

Ta-da! A shimmery shamrock tree!

We added 1 lucky four-leaf clover!

Sunday, February 26, 2012

Sunday Snapshots

Leftover cheesecake!!

Broccoli bites, mashed potatoes, and mixed veg! 

Toddler insisted because it looks like a tractor from Cars.
Yellow tulips from my Mom

A project I've been meaning to do...

Corn Soup

I stumbled across The Pioneer Woman blog a year or so ago and fell in love with a lot of the recipes posted on there. Some of our favourite dinners have come from that site and this soup is no exception.

The only problem with the recipes I find on The Pioneer Woman is that they tend to be heavy on butter, fatty creams, and lots of meats....all things we try to stay away from.

When I saw this recipe for Corn and Cheese Chowder I knew I had to give it a try. Soup is one of the greatest loves of my life. I made a few changes to the original recipe and think it turned out wonderfully. In fact, my husband asked me to make it for dinner again this week.

Cheesy Corn Soup My Way

What You Need:

4 cups chicken stock (I use homemade)
1.5 red bell peppers, chopped
1/2 a small bag of frozen corn kernels
2tbsp butter or margarine
1.5 cups grated cheese (I used marble)
2-2.5 cups milk (I used skim)
1-2 small onions, chopped
2 cloves garlic, grated

How to Make it:

In a large pot, melt your margarine and then add your onions, garlic, and peppers. Cook until the onions begin to turn translucent and soft. Add in your chicken stock and bring to a low boil, then add in your frozen corn. Salt and pepper to taste, then, cook for five minutes before adding in your milk and cheese. Cook until the cheese has fully melted.

And that's it! It is so easy and so delicious!


The original recipe calls for being thickened with flour but I didn't have any in the house so we skipped that part. But, I think I preferred it thinner. The original recipe also called for green onions, which I had but forgot to use. Oops.

This week, my husband has asked me to add bacon to it, so we'll be testing that out, too (that was also in the original recipe).

Thursday, February 23, 2012

Let's Make a Rainbow...and get a little messy!

Bringing a little colour into our lives and sort of tying into the St. Patty's Day theme (pot of gold at the end of the rainbow...it's a stretch, but whatever!)

What You Need:

Plain white paper
Paint (we used red, green, yellow, purple, and blue)
Brushes
White liquid glue
White foam shaving cream
A black marker

How to Make it:

Draw a rainbow with clouds on your piece of paper using your black marker. This will be your stencil.

In a small bowl mix equal parts white glue and shaving cream. Mix it together well. I let my son paint the clouds first but you could do them last. You want them to leave it as thick as possible. When this dries it will be soft and fluffy, like a cloud!


Then, give them brushes and their colours and let them paint the rainbow. I tried to show my son how to paint one colour per line, but he was having none of that. But, that's OK, it's his rainbow!


Then, just let it dry and you have a colourful and fluffy indoor rainbow!


Our second craft is a messy one. And I mean, MESSY!

Ice Cube Paintings

What You Need:

Ice cube tray
Popsicle sticks (or toothpicks)
Paints
Water

How to Make it:

Place a blob of paint in the bottom of the each ice cube compartment and then top it off with water. Mix well. The more paint you use the brighter the colours will be, the less paint the lighter. I also use water and food colouring, which acted more like watecolours.

Place your posicle sticks in the ice cubes and then freeze until solid.

Give you child a piece of paper and let them paint! I put the paper in a tray but most of the mess got on my toddler's hands.


What they can learn:

-Different painting styles: Dabbing, sliding or watching cubes melt
-Mixing colours
-temperature (my toddler kept telling me it was "pretty cold")
-fitting the cubes back into the tray
-identifying their colours
-working on fine motor skills


In the end, the mess was definitely worth all the fun he had!

Wednesday, February 22, 2012

Spring is coming!

It feels like spring is just around the corner. One of the ways I know spring is nearing is when you start to see robins.

And, look! Robins are making their way into our home.


St Patrick's Day Craft

St. Patrick's Day is not a holiday I pay as much notice to now that I am no longer a bar-hopping, green beer swilling youth. This year, my son is just old enough to grasp some of the St. Patty's fun so I've been digging around the internet for some themed crafts.

Today, we did our first green-themed craft!

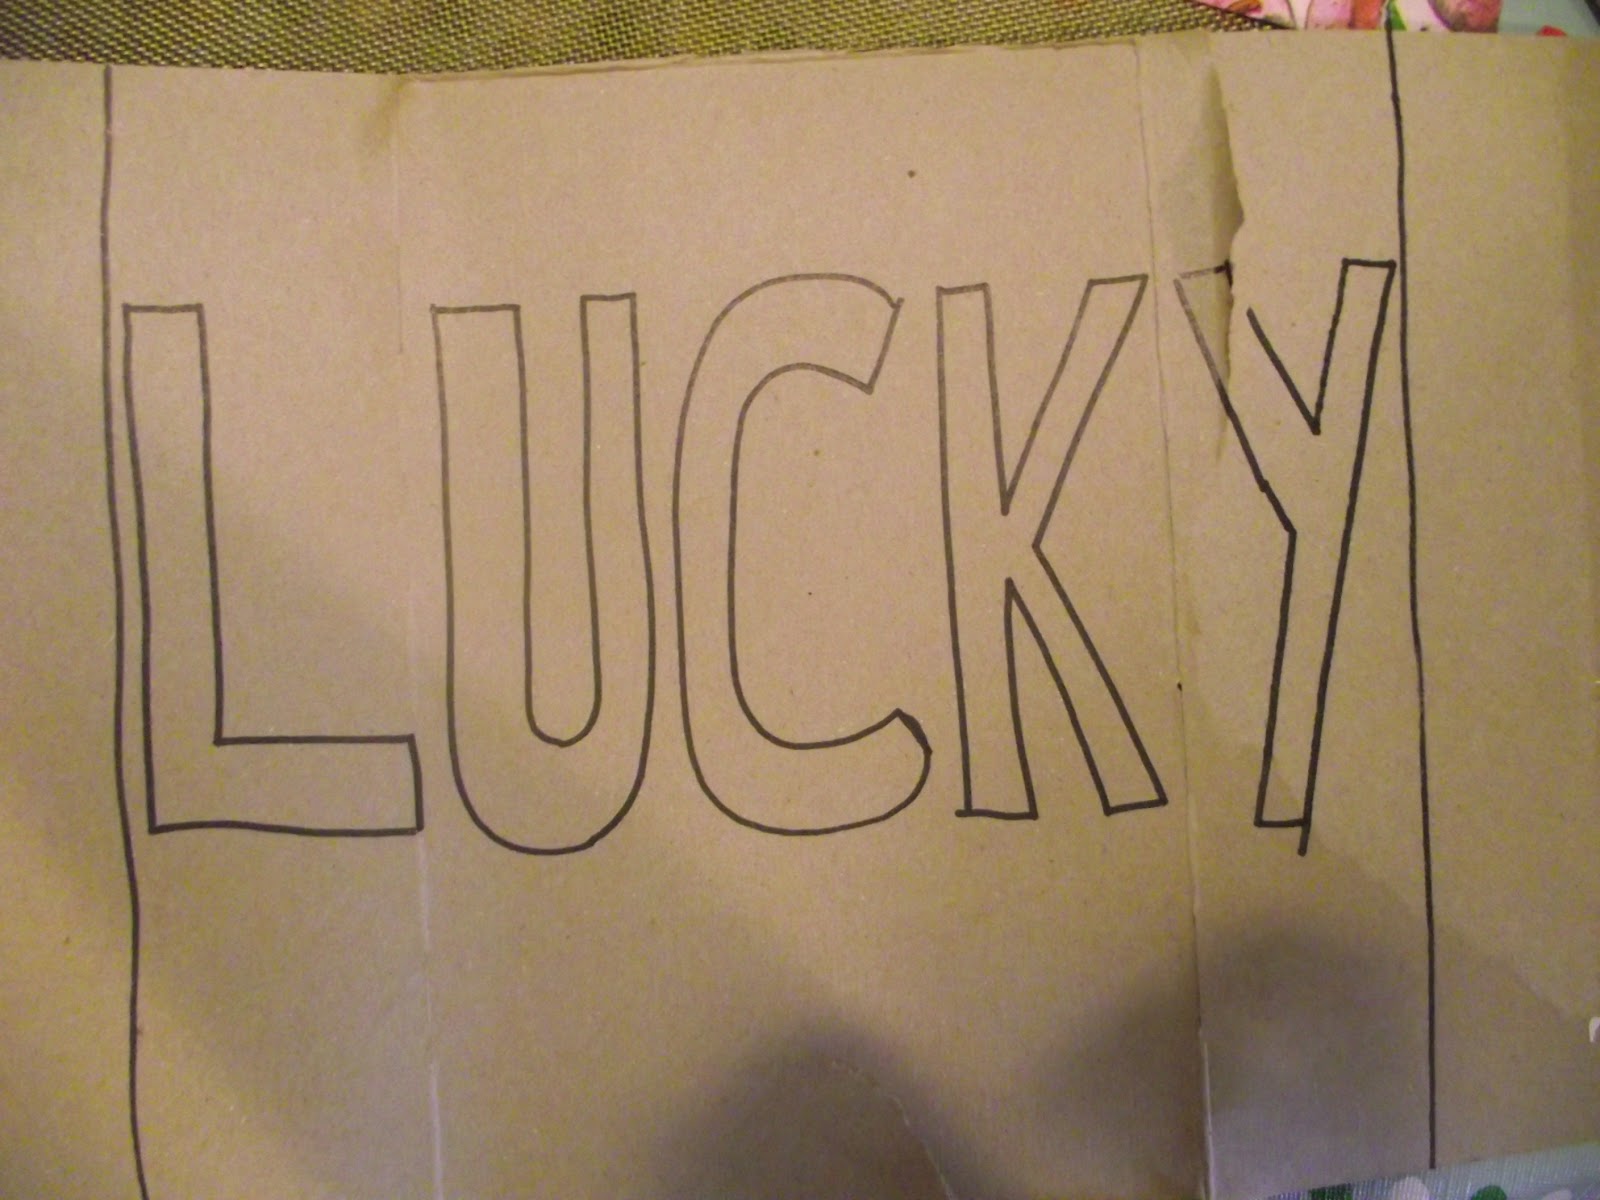
"Lucky" Poster


What you need:

Thin cardboard
Exacto knife
Cutting board
Sheet of plain white paper
Tape (preferably masking or paint)
Green paint
A shamrock stamp (bought or made yourself)

How to make it:

Write the word "Lucky" on your piece of cardboard. Then, use your exacto knife to cut out the letters. This is your stencil!


Tape your piece of paper over the cardboard. Now, when I did this I couldn't find my masking or painter's tape so I had to use duct tape. I do not advise this! Even though I pressed it on my pants a few times (to make it less sticky) I still couldn't get it off the paper. All that means is I had to leave the tape on the back and cut the excess off. So, it was just an extra (unnecessary) step.

Then, give your toddler a brush and the green paint and let them go to town!


While you let it dry you can get your stamp ready. I cut a russet potato in half and then carefully cut out a four-leaf clover shape. It didn't take very long at all.


Once your "Lucky" picture is dry peel it off the cardboard. Put some green paint on a paper plate and let your child stamp some clovers around their picture.


Ta-da! An easy way to start getting ready for St. Patrick's Day!


And it's just about time to swap out my winter subway art for my St. Patrick's one!


Download here


Bonus note: This site has some awesome ideas for St. Patrick's Day! My favourites are to fill your kid's shoes with candy coins and green things the night before St. Patrick's Day; to hide candy coins around the house and have your kids find them; and, to have a scavenger hunt with a pot of gold (candy) at the end; and, topple over some furniture, leave a bit of a mess and make some green footprints (with washable paint ) in your house to make it look like some leprechauns had a party! Such awesome ideas.

Little Boys

I absolutely love having a son. My son is wild and crazy but sweet and loving all at the same time. He's loud, likes to jump in puddles, screams, and pretends he's an airplane; but, he's also quiet and gentle. Really, it's the best of all worlds.

I made this today for his room.

Having a son rocks!


To download and print go here.